Emergency Roof Repair: 7 DIY Steps to Take After Damage
 14min Read
 Posted 7.10.2026
An emergency roof repair starts with seven specific homeowner steps after storm damage: ensure family safety first, contain interior water damage, document the damage with photos, contact your insurance carrier within 24 to 48 hours, call a qualified roofing contractor for professional inspection and tarping, save all storm-related receipts, and avoid climbing onto the damaged roof. Owl Roofing is a GAF Certified roofing contractor serving Blaine and surrounding Twin Cities communities, and the team handles emergency response calls during storm season with fast inspection availability. This guide walks through the seven safe DIY steps every Blaine homeowner should take immediately after roof damage occurs, plus what professionals handle that homeowners should never attempt.
- Lawn swept 3x with magnets
- Storm restoration specialists
- We actually answer: (651) 977-6027
 5.0 · 90+ reviews
 Accredited
Owl is the local family-owned roofer that actually cares.
250+ Twin Cities families have trusted us with their homes. Book a free inspection and see why.
★★★★★“We couldn’t be happier with how everything turned out. From the beginning to the end, the whole experience was great.”
Rob Larson, Local Homeowner + Owl Customer
A real person calls you back, usually within the hour.
- Safety-first actions: Steps homeowners can complete safely from the ground or inside.
- Documentation requirements: What to photograph and record for insurance claims.
- Professional tasks: What requires a qualified contractor rather than DIY attempts.
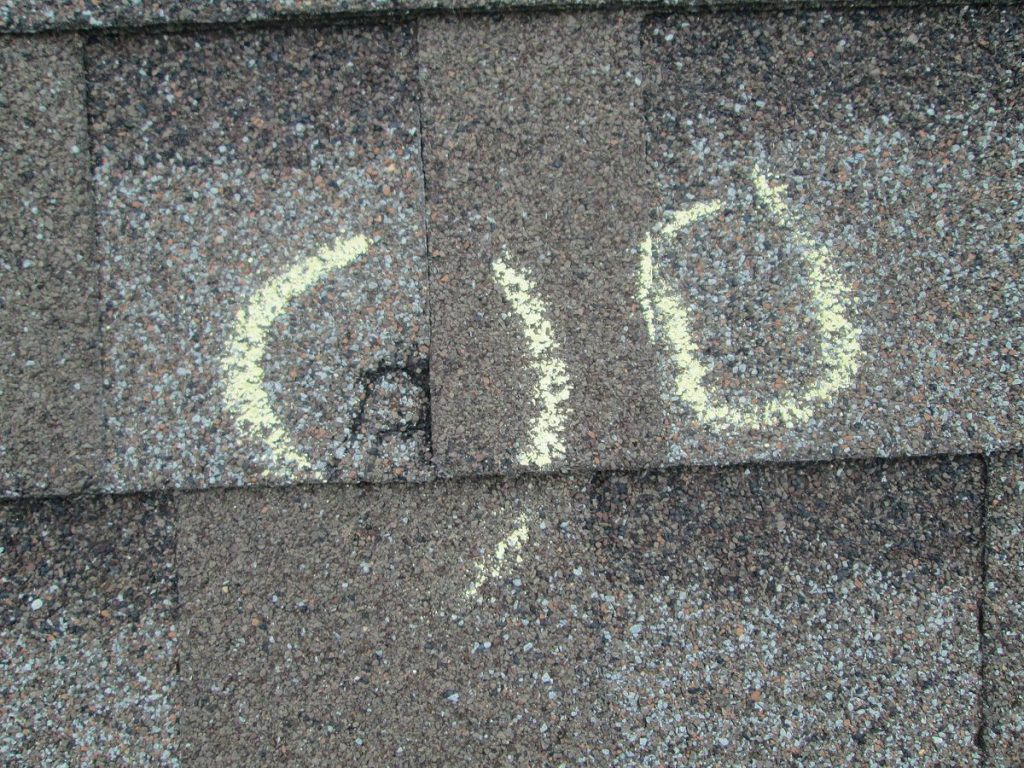
Emergency Roof Repair Safety First
Emergency roof repair safety first means homeowners should focus on actions they can complete safely from the ground or inside the home, leaving roof-surface work to qualified contractors. Owl Roofing responds to emergency calls across Blaine and surrounding areas with trained crews who handle tarping and temporary repairs that homeowners should not attempt.
Why Should Homeowners Avoid Climbing on a Damaged Roof?
Homeowners should avoid climbing on a damaged roof because falls are the leading cause of work-related deaths among residential construction workers, and the same hazards apply to homeowners attempting DIY emergency repairs. Wet shingles after a storm are extremely slippery, damaged shingles and decking provide unstable footing, exposed nails create puncture risks, downed power lines near the roof present electrocution hazards, and missing shingles can expose holes in the deck that look identical to sound surfaces from above. The cost of professional emergency tarping is significantly less than the cost of a serious injury or worse.
- Falls leading cause: Primary cause of residential construction worker deaths.
- Wet shingle hazard: Extremely slippery surface after storms.
- Power line risk: Storm damage often involves downed power lines near roofs.
- Hidden deck damage: Missing shingles expose unstable holes.
What Emergency Roof Repair Tasks Should Homeowners Never Attempt?
Homeowners should never attempt tarping a damaged roof, walking on a damaged roof surface, removing fallen tree branches from the roof, replacing missing shingles, repairing damaged flashing, or any other roof-surface task during emergency response. Owl Roofing handles all of these tasks with trained crews using OSHA-required safety equipment because the combination of storm damage, weather conditions, and time pressure during emergencies creates the highest injury risk of any roofing work. The seven DIY steps listed below focus exclusively on safe ground-level and interior actions that protect the home, support the insurance claim, and prepare for professional repair. Roof-surface work belongs to qualified contractors with proper equipment.
- No DIY tarping: Professional installation prevents tarp failure during next storm.
- No roof walking: Storm-damaged surfaces are extremely unstable.
- No branch removal from roof: Falling branches and unstable footing combine.
- No shingle replacement: Improper repair voids manufacturer warranties.
7 DIY Steps to Take After Roof Damage
Seven specific steps belong on every Blaine homeowner’s emergency roof repair checklist after storm damage. Owl Roofing recommends completing each step in order during the first 24 to 48 hours after the event.
1. Ensure Family and Pet Safety First
Family and pet safety first means moving everyone away from any areas with active water intrusion, sagging ceilings, or structural concerns before taking any other action. Owl Roofing emergency response teams find homeowners across Blaine sometimes prioritize damage assessment over safety after storms, which creates unnecessary risk in unstable homes. Ceilings with significant water damage can collapse without warning, especially with continued water intrusion. Electrical hazards from water meeting wiring create shock risks in any room with active leaks. Pets should be moved to dry, secure areas away from broken glass, debris, and any structural concerns. The first 30 minutes after a storm should focus entirely on confirming everyone is safe before attempting any documentation or repair tasks.
- Move from damaged areas: Away from water intrusion and sagging ceilings.
- Electrical safety: Water plus wiring creates shock hazards.
- Pet relocation: Move animals to dry, secure spaces.
- First 30 minutes: Focus exclusively on safety confirmation.
2. Contain Interior Water Damage
Containing interior water damage means placing buckets under active leaks, moving valuables away from wet areas, and covering furniture and electronics with plastic sheeting or tarps. Owl Roofing recommends Blaine homeowners contain water damage as soon as safety is confirmed because every minute of unmitigated leaking adds to the eventual repair scope. Buckets catch active dripping water before it reaches floors and damages flooring or subflooring. Moving valuables protects items the insurance policy may not fully cover. Plastic sheeting over furniture and electronics prevents secondary damage from continued water intrusion. Towels placed at the base of walls help absorb water before it wicks into baseboards and wall cavities. These containment steps significantly reduce overall damage costs.
- Place buckets under leaks: Catch active dripping water immediately.
- Move valuables: Protect items from continued water exposure.
- Cover furniture: Plastic sheeting prevents secondary damage.
- Towel placement: Absorb water at baseboards and wall bases.
3. Document All Damage With Photos
Documenting all damage with photos means taking timestamped photos of interior damage from every angle, exterior damage visible from the ground, the storm event itself with hailstones next to a coin for size reference, and any visible roof damage that can be seen safely from windows or upper floors. Owl Roofing emergency response teams use homeowner-provided photos as supplemental documentation for insurance claims across Blaine and surrounding areas. Photos taken immediately after the storm capture the original damage scope before cleanup, repair, or weathering changes the visible evidence. Wide-angle shots establish context, while close-up shots document specific damage points. Every room with water damage needs separate photos showing ceilings, walls, flooring, and personal property. The documentation strengthens the insurance claim significantly.
- Interior photos: Every room with water damage from multiple angles.
- Ground-level exterior photos: Visible roof damage and property damage.
- Hailstone photos: With coin or measuring tape for size reference.
- Timestamp verification: Confirms photos taken immediately after the event.

4. Contact Your Insurance Carrier Within 24 to 48 Hours
Contacting your insurance carrier within 24 to 48 hours of the damage strengthens the claim by demonstrating prompt action and meeting most policies’ notification requirements. Owl Roofing recommends Blaine homeowners contact the carrier directly using the policy’s claims phone number rather than going through an agent because the claims department processes faster on emergency calls. The initial call opens the claim file, schedules an adjuster inspection, and provides a claim number for all subsequent documentation. Some carriers require notification within 24 to 72 hours, with delayed notification potentially complicating claim approval. The homeowner does not need full damage documentation to file the initial claim, which is helpful because complete documentation typically requires contractor inspection.
- Direct claims line: Faster processing than going through an agent.
- Within 24 to 48 hours: Strengthens claim and meets most policy requirements.
- Claim number provided: Used for all subsequent documentation.
- Adjuster scheduled: Inspection coordinated during the initial call.
5. Call a Qualified Roofing Contractor for Professional Inspection
Calling a qualified roofing contractor for professional inspection within the first 24 to 48 hours produces written damage documentation that supports the insurance claim and identifies emergency repairs needed to prevent further damage. Owl Roofing provides emergency inspections across Blaine and surrounding areas during storm season. The contractor inspects the roof safely from a ladder or roof surface using OSHA-required fall protection, identifies damage the homeowner cannot see from the ground, takes professional-quality photos for the claim, installs emergency tarping over damaged sections, and provides a written damage report. The contractor should also attend the insurance adjuster’s inspection to ensure the damage scope is documented accurately.
- Same-day availability: During storm season for emergency response.
- Safe inspection: Using OSHA-required fall protection equipment.
- Written damage report: Supports the insurance claim filing.
- Adjuster attendance: Contractor present during inspection ensures accurate scope.
6. Save All Storm-Related Receipts and Records
Saving all storm-related receipts and records means keeping documentation of every expense incurred from the storm event through the final repair, including emergency supplies purchased, contractor inspection fees, temporary tarping costs, debris removal expenses, water cleanup costs, and any temporary lodging if the home becomes uninhabitable. Owl Roofing recommends Blaine homeowners save physical and digital copies of every receipt because insurance claims often reimburse documented emergency expenses in addition to the roof repair itself. The complete record also includes a written timeline of when the storm hit, when leaks started, who was called, what temporary steps were taken, and what damage was discovered. Documentation gaps weaken the claim significantly.
- Emergency supply receipts: Tarps, buckets, plastic sheeting, fans.
- Contractor invoices: Inspection fees and emergency repair costs.
- Cleanup expenses: Water extraction, debris removal, and restoration costs.
- Written timeline: Storm date, leak start, calls made, steps taken.
7. Avoid Permanent Repairs Until Insurance Approves the Scope
Avoiding permanent repairs until insurance approves the scope means not authorizing full roof replacement or major repair work before the insurance carrier has inspected the damage and approved the claim. Owl Roofing emergency response includes temporary tarping that protects the home during the claim process without disrupting the damage evidence the adjuster needs to see. Permanent repairs completed before adjuster inspection sometimes result in claim denials because the carrier cannot verify the damage scope after the repair. The proper sequence is emergency stabilization (tarping), claim filing, adjuster inspection, claim approval, and then permanent repair. Skipping the adjuster inspection often costs the homeowner more than the inspection delay would cost in additional damage.
- Temporary tarping only: Protects the home without disrupting damage evidence.
- Adjuster inspection first: Required before permanent repair work.
- Proper sequence: Stabilize, file claim, inspect, approve, repair.
- Skipping inspection: Sometimes results in claim denial.
What Does Emergency Roof Repair Cost in Blaine?
The cost of emergency roof repair in Blaine depends on the damage extent, the temporary protection required, and whether the work is part of a covered insurance claim. Owl Roofing provides itemized estimates for emergency response work so homeowners know exactly what each component costs.
How Much Does Emergency Tarping Cost in Blaine?
Emergency tarping costs $300 to $1,500 in Blaine depending on the size of the damaged area, the slope and height of the roof, and the type of tarp material used. Owl Roofing prices emergency tarping with clear line items for tarp material, labor, and any necessary debris removal before tarp installation. Heavy-duty polyethylene tarps with proper mechanical anchoring run higher than lightweight tarps because the material lasts longer and stays secure in subsequent storms. Insurance carriers typically reimburse emergency tarping under the policy’s mitigation coverage when the underlying damage is from a covered peril. The temporary tarping serves until permanent repair or replacement can be completed, typically 30 to 90 days.
- Emergency tarping range: $300 to $1,500 in Blaine.
- Heavy-duty polyethylene: Higher cost with longer service life.
- Mechanical anchoring: Required for proper installation.
- Insurance reimbursement: Typically covered under mitigation provisions.
How Long Does Emergency Tarping Last?
Emergency tarping lasts 30 to 90 days in Minnesota weather conditions when installed by a qualified contractor with proper materials and anchoring. Owl Roofing emergency tarps stay secure through wind, rain, snow, and freeze-thaw cycles during the temporary protection period. The 30-to-90-day window exists because tarps are not designed for long-term roof protection, and the underlying damaged roof continues to deteriorate under the tarp. Permanent repair or replacement should be scheduled as soon as the insurance claim is approved. Tarps left in place beyond 90 days face increasing risk of failure as the material weathers and the anchoring loosens.
- Service window: 30 to 90 days of reliable protection.
- Material weathering: Tarps degrade beyond the 90-day window.
- Anchoring stability: Mechanical anchors prevent storm displacement.
- Permanent repair timing: Scheduled as soon as the claim is approved.
Owl Roofing Emergency Response in Blaine
Owl Roofing provides emergency response across Blaine and surrounding Twin Cities communities during storm season. The team handles inspections, tarping, and insurance coordination as a complete emergency service package.
How Does Owl Roofing Handle Emergency Roof Repair Calls?
Owl Roofing handles emergency roof repair calls in Blaine during storm season, immediate emergency tarping on damaged sections, written damage documentation for insurance claims, and direct coordination with the homeowner’s insurance carrier. The team uses OSHA-required fall protection equipment on every emergency response job, applies heavy-duty polyethylene tarps with mechanical anchoring that withstands subsequent storms, and provides photo documentation of both the damage and the temporary repair. Emergency response is available across Blaine and surrounding areas during regular storm season, with extended hours available during major weather events that produce widespread damage.
- Same-day availability: During storm season for emergency response.
- Heavy-duty tarping: Polyethylene with mechanical anchoring.
- OSHA safety equipment: Used on every emergency job.
- Insurance coordination: Direct adjuster communication included.

Frequently Asked Questions
Should I Tarp My Own Roof After Storm Damage?
Owl Roofing recommends Blaine homeowners do not tarp their own roof after storm damage because the combination of wet shingles, damaged decking, and storm aftermath creates an extremely high injury risk. Falls are the leading cause of work-related deaths among residential construction workers, and amateur tarping fails frequently in subsequent storms. Professional emergency tarping costs significantly less than the cost of a serious fall injury.
How Quickly Should I Respond to Roof Damage?
Owl Roofing recommends responding to roof damage within 24 to 48 hours of the event by completing the safe DIY steps and scheduling professional inspection. Insurance claims typically require notification within this window, and unmitigated water damage compounds quickly during the first few days. The full emergency response cycle from storm event through professional tarping should complete within 72 hours when possible.
Does My Insurance Cover Emergency Roof Repairs?
Homeowners insurance typically covers emergency roof repairs in Blaine when the underlying damage is from a covered peril like hail, wind, or fallen trees. Most policies include mitigation coverage that reimburses temporary protection costs like tarping and debris removal in addition to the eventual permanent repair. Owl Roofing coordinates with insurance carriers to ensure emergency response costs are documented properly for claim reimbursement.
What Should I Do If Water Is Coming Through the Ceiling?
When water is coming through the ceiling after roof damage, place buckets under the active leak, move valuables away from the affected area, and call a qualified roofing contractor for emergency tarping. Owl Roofing dispatches emergency response crews to active interior leaks across Blaine. Puncturing a small drainage hole in a sagging ceiling section helps prevent broader collapse by directing water flow to a controlled point.
Can I Replace Missing Shingles Myself?
Replacing missing shingles after a storm is not recommended for homeowners because the work requires walking on a damaged roof, identifying matching shingle products, achieving proper nailing patterns for warranty compliance, and ensuring the surrounding shingles are not also damaged. Owl Roofing performs shingle replacement as part of professional repair work in Blaine with full warranty preservation. Insurance claims also typically cover professional repair rather than DIY work.
What If I Need Emergency Repair on a Weekend or Holiday?
Owl Roofing provides emergency response coverage in Blaine during weekends and holidays throughout storm season because severe weather rarely respects business hours. The team schedules inspections for storm damage that requires immediate attention. Homeowners with active leaks or significant damage should call immediately rather than waiting for the next business day.
Get Your Emergency Roof Inspection Scheduled
Owl Roofing handles emergency roof repair across Blaine and surrounding Twin Cities communities with GAF Certified installations, insurance claim coordination, emergency repair availability, fast turnaround, free inspections, financing options, and a maintenance program designed to protect the roof investment for its full service life. Every Owl Roofing emergency response includes free inspection, written damage documentation, immediate temporary protection, and direct coordination with the insurance carrier.
Contact Owl Roofing to schedule emergency roof inspection for your Blaine home and get a written damage report ready to support your insurance claim.

Recent Articles
Explore The Blog