What to Expect During a Twin Cities Roof Replacement: Day by Day
 9min Read
 Posted 5.02.2026
Sarah pulled into her driveway at 5:30 PM after a long day at work and saw something she didn’t expect. There were tarps draped from her gutter line down to her flowerbeds, a dump trailer in the driveway with the bottom course of her old shingles still visible, and a crew of four cleaning up tools while a foreman walked the perimeter with a magnetic nail bar. Her roof was half-stripped, half-shingled, and entirely watertight — the dry-in had been completed before lunch. She’d left for work that morning with an old roof. By tomorrow afternoon she’d have a new one. The whole process was on schedule and exactly what her contractor had described in writing two months earlier.
Knowing what to expect during a Twin Cities roof replacement is the difference between a stressful week and a smooth one. Most homeowners overestimate how disruptive the process is, underestimate how visible the work crew presence will be, and don’t know what’s normal during the first weeks afterward. This guide walks through the experience from the homeowner’s perspective, day by day, from the week before tear-off through the first year after install.
At Owl Roofing in Shoreview we run several reroofs each week and have walked hundreds of homeowners through the process. Noah Bergland personally briefs each premium project’s homeowner before tear-off so they know what to expect. This guide reflects what we tell every client.
TL;DR
For a typical Twin Cities reroof: 1 day prep, 2-4 days on roof, 2 weeks of “watching for issues,” then permanent. The homeowner’s role is small but specific: clear the perimeter, move vehicles, remove wall hangings if you have plaster walls, and stay off the property during active tear-off. Expect dust, occasional pneumatic nailer noise from 8 AM to 5 PM, and a magnetic sweep of the yard at end of each day plus the morning after. The crew leaves the home watertight every night even mid-install. Issues to watch for in the first weeks are minor and rare on quality installs.
The week before tear-off: what to do
Most reputable contractors will give you a one-week notice before tear-off. Use that week to prepare:
Move vehicles and outdoor items
Park cars in the street or a neighbor’s driveway during work days. The dump trailer typically goes in your driveway, and the crew needs space to stage materials. If you have valuable patio furniture, grills, or planters near the house, move them at least 10 feet from the wall.
Remove wall hangings (plaster homes only)
Pneumatic nailers create vibration that can knock pictures off plaster walls. Drywall homes (most post-1960 construction) don’t have this issue. If you live in a 1920s or older Twin Cities home with plaster walls, take down anything fragile from interior walls under the work area.
Notify neighbors
A quick text or note to immediate neighbors about the construction window is good neighbor etiquette. The dump trailer, dust, and noise affect the people next door. Most appreciate the heads-up.
Confirm pet plans
Dogs particularly don’t enjoy reroof days. Plan to board the dog or arrange day-care during the noisiest 1–2 days. Cats typically hide and recover quickly but may shed more from stress.
Set up a power outlet
The crew needs an exterior outlet for the air compressor. Confirm where this is and that it’s working. Most homes have a GFCI outlet on the back or side of the house.
Day 1: Tear-off and dry-in (8 AM to 5 PM)
The crew arrives between 7 and 8 AM. Expect 4–6 trucks, a dump trailer, and a portable air compressor. The first 30 minutes is setup: tarps over your shrubs, plywood over HVAC equipment, ladders going up.
Tear-off begins around 8:30 AM and continues until lunch. You’ll hear roofers walking on shingles, the rip-pull sound of shingles being scraped off, and the occasional thud of bundles hitting the dump trailer. Dust and debris fall consistently — the tarps catch most of it. By midday the deck is exposed and looks dramatically different than it did at sunrise.
Lunch is typically 30 minutes on-site. Crews don’t usually leave the property unless the foreman runs to a supply house for replacement parts.
Afternoon: deck inspection and dry-in. The carpenter checks every plywood sheet, replaces any rotten or soft sections, and the crew rolls out ice and water shield at eaves and valleys followed by synthetic underlayment across the field. By 5 PM the home is fully watertight even though no shingles are on yet.
End of day: magnetic nail sweep across the perimeter. The crew leaves a clean yard and a closed-up dump trailer.
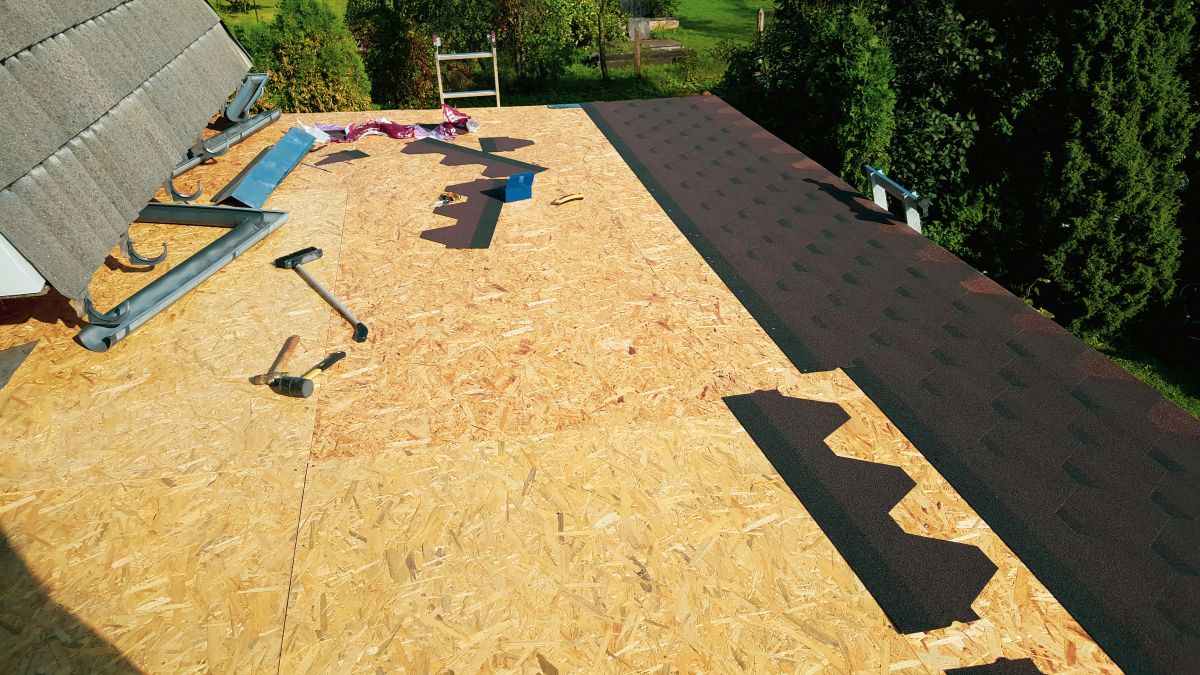
Day 2: Shingle installation (8 AM to 4 PM)
Quieter day in some ways. Less ripping, more rhythmic nailing. Hand-sealed starter strip on rakes and eaves first, then field shingles bottom-up working both slopes. A four-person crew installs about 18–22 squares per day, so most reroofs reach the ridge by mid-afternoon.
Visible from the ground: the new shingle color taking over slope by slope. By noon the front of the home looks dramatically different. By 3 PM the field shingles are typically complete on a 25-square house.
End of day: ridge cap and final perimeter detail go on. Magnetic sweep again. The roof now looks essentially complete from the ground.
Day 3: Final flashing and cleanup (8 AM to noon)
Half day. Step flashing at chimneys and walls, pipe boots installed and sealed, drip edge corners crimped. The foreman walks the home with the homeowner if available, points out the new install, and notes any items needing follow-up.
By noon the dump trailer is removed, tarps come down, and the yard gets a third magnetic sweep. The work is done.
The first week after install
Almost nothing happens. The roof looks brand-new. You may notice:
- Faint asphalt smell for 2–4 days as the new shingles cure in the sun. Strongest on hot days.
- Occasional granules in gutters for the first 2–4 weeks as loose granules wash off in rain. Normal and expected.
- A few stray nails appearing in the yard or driveway. The magnetic sweep is thorough but not perfect — watch tire and bare feet for the first week.
- Slight color uniformity as the shingles fully bond to the seal strip in warm weather (typically within 48 hours of install in summer).
If you notice anything more concerning — visible lifted shingles, a leak inside, missing flashing — call your contractor immediately. Most reputable contractors will dispatch a foreman within 24 hours.
The first month: what’s normal vs not
By week 2 the new roof should look fully settled. Normal observations:
- Fewer granules in the gutters (the early shed has slowed)
- Asphalt smell gone
- Yard fully clean of debris
- No visible difference between the day-of install appearance and current state
Not normal — call your contractor:
- Visible lifted or loose shingles after the first wind event
- Water staining on interior ceilings
- Granules collecting in unusual quantities (more than a small handful per gutter run)
- Visible nail pops or dimpling on the new shingles
None of these are common on a quality install but all are addressable if they occur.
The first year: settling in
By the time the first winter passes and spring returns, the roof is fully integrated into the home’s envelope. The shingles have gone through one freeze-thaw cycle and any minor settling has stabilized. The seal strips are fully bonded. The roof is now in its long-term steady state.
Most premium contractors include a one-year follow-up walk during this period to verify everything is sealed, intact, and functioning as designed. Manufacturer warranty paperwork is typically completed during this window, with copies sent to the homeowner for permanent records.
Specific things homeowners often worry about that turn out to be fine
Several concerns come up frequently and rarely turn into actual problems:
- “The crew will damage my landscaping.” Tarps and plywood protect plants and HVAC equipment. Damage is rare and contractors carry insurance for the rare incident.
- “The dust will get inside the house.” Tear-off dust stays mostly outside. A small amount may infiltrate through open windows or vents — close windows on the work side during tear-off.
- “My driveway will be ruined by the dump trailer.” Reputable contractors use plywood pads under trailer wheels and corner stabilizers. Damage is uncommon.
- “Nails will be in my yard for years.” Magnetic sweep at end of each day plus the morning after typically catches 99%+ of nails. Walk the yard once after the first week and you’ll usually find one or two.
What real homeowners say
“Owl gave us a written timeline that named the foreman, the crew lead, and the daily schedule. They hit every milestone. The crew was on the property exactly when they said they would be, the cleanup was professional, and the roof looked perfect on day 3. We’d been dreading the project for a year and it ended up being one of the smoothest home improvement experiences we’ve had.” — John Wharton
Frequently asked questions
Do I need to be home during the reroof?
No, but plan to stay off the property during active tear-off because of debris and noise. The crew can complete the entire scope without homeowner presence as long as they have access to the yard and a power outlet.
How long should the project take?
For a typical Twin Cities home: 2–4 working days for a basic reroof, 6–9 days for metal, 8–12 days for synthetic slate. Our timeline guide covers full schedule details.
What happens if it rains?
The crew dries in the deck before leaving each day, so the home is watertight even if work is paused. Active rain pauses tear-off and shingle install. Most weather delays add 1–2 days to the schedule.
Will my interior walls be damaged from vibration?
Drywall walls (most post-1960 homes): no. Plaster walls (older homes): occasionally things fall off walls — take down fragile items in advance.
What’s the most important thing I should do as a homeowner?
Move vehicles, clear the perimeter, brief the contractor on any sensitive areas (specific landscaping, satellite dishes, roof-mounted solar), and stay reachable for the foreman in case decisions come up during deck inspection.
Where to start
If you’re planning a reroof and want to feel prepared, schedule a pre-install walk with your contractor about 1 week before tear-off. They can walk the property, identify anything to address, and confirm the schedule and crew assignments.
Request a free Owl Roofing quote and we’ll provide a written timeline and pre-install briefing as part of the project. You can also explore our timeline guide, our cost guide, our contractor selection guide, our roofing services, and our brand library.