


What Causes Ice Dams and How to Stop Them
 13min Read
 Posted 12.13.2025
What Causes Ice Dams and How to Stop Them
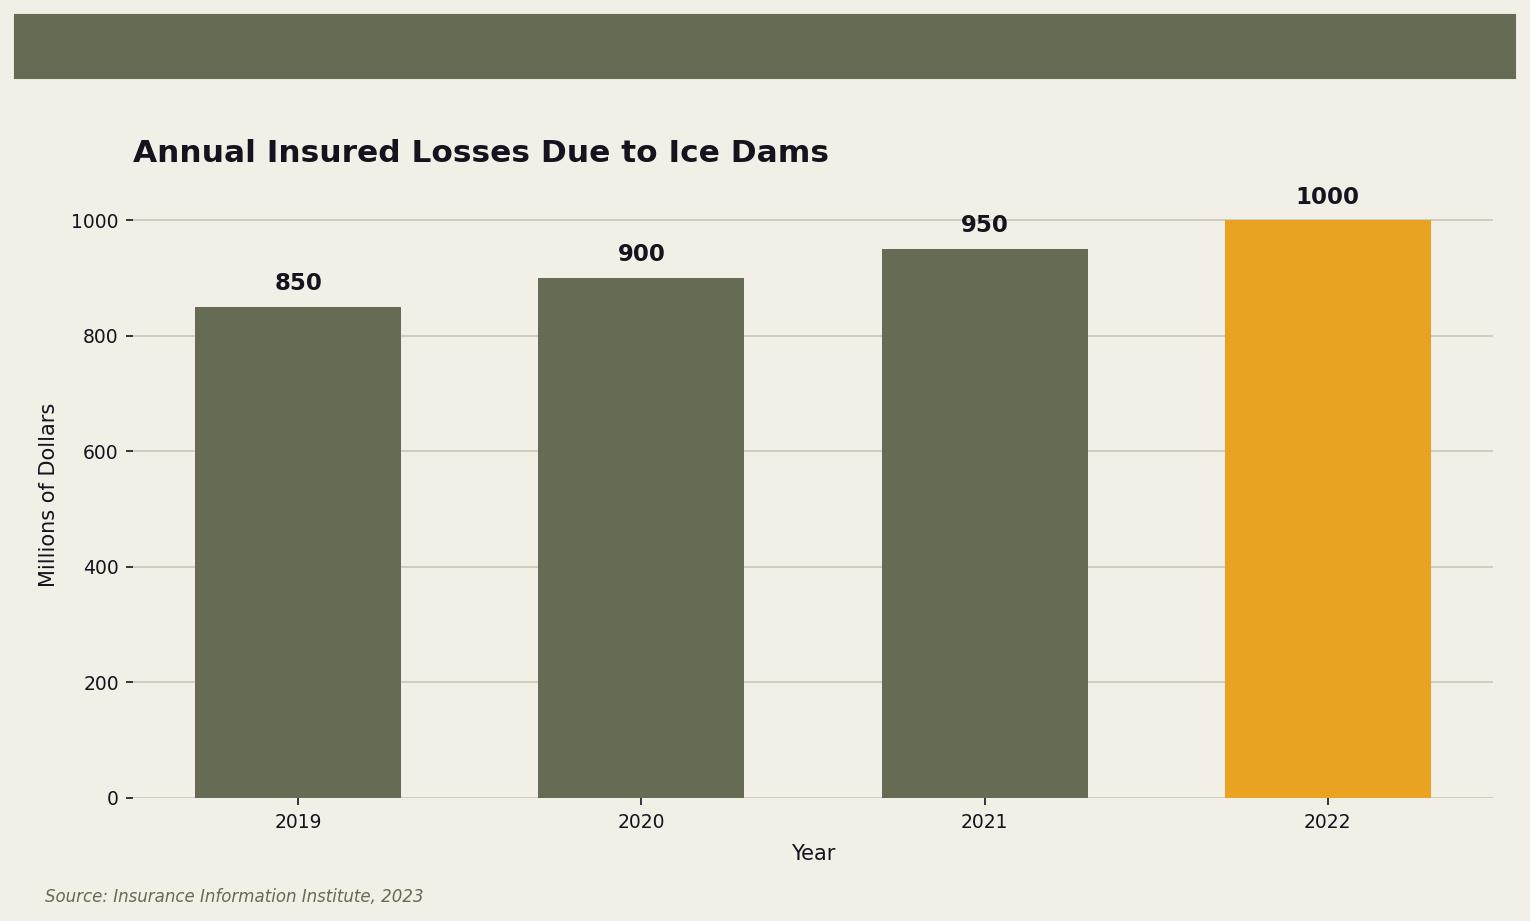
That ridge of ice creeping along your roofline? It’s not just ugly—it’s actively trying to flood your living room. Every winter, Twin Cities homeowners watch helplessly as ice dams turn their roofs into leaky sieves, and according to the Insurance Information Institute, these frozen troublemakers cause over $1 billion in insured losses annually across the U.S. If you’ve ever woken up to a mysterious water stain spreading across your ceiling in January, you know exactly how personal that statistic feels.
Here’s the thing about ice dams: they’re sneaky. One day you’re admiring the pretty icicles hanging from your eaves, the next you’re calling your insurance company about the waterfall in your spare bedroom. But here’s the good news—ice dams are almost entirely preventable. Once you understand what’s actually happening up there on your roof, you can stop the problem before it starts. Let’s break down exactly what causes ice dams and what you can do about them.
The Real Cost of Ignoring Ice Dams
Let’s be honest about what’s at stake here. Ice dams aren’t just a cosmetic issue or a minor inconvenience you can deal with “next year.” When water backs up behind that frozen ridge and seeps under your shingles, it doesn’t politely stay in one spot. It travels. It soaks into your insulation (goodbye, energy efficiency). It saturates your drywall (hello, mold). It drips down into your walls where you can’t even see it (structural damage, anyone?).
The National Roofing Contractors Association (NRCA) reports that roof leaks are the leading cause of interior water damage during winter months. And those repairs? They’re not cheap. We’re talking thousands of dollars—sometimes tens of thousands—depending on how long the damage goes undetected. That beautiful hardwood floor in your bedroom? Water-warped. Those family photos stored in the attic? Ruined. The paint you finally picked out after debating seventeen shades of gray? Peeling off the wall.
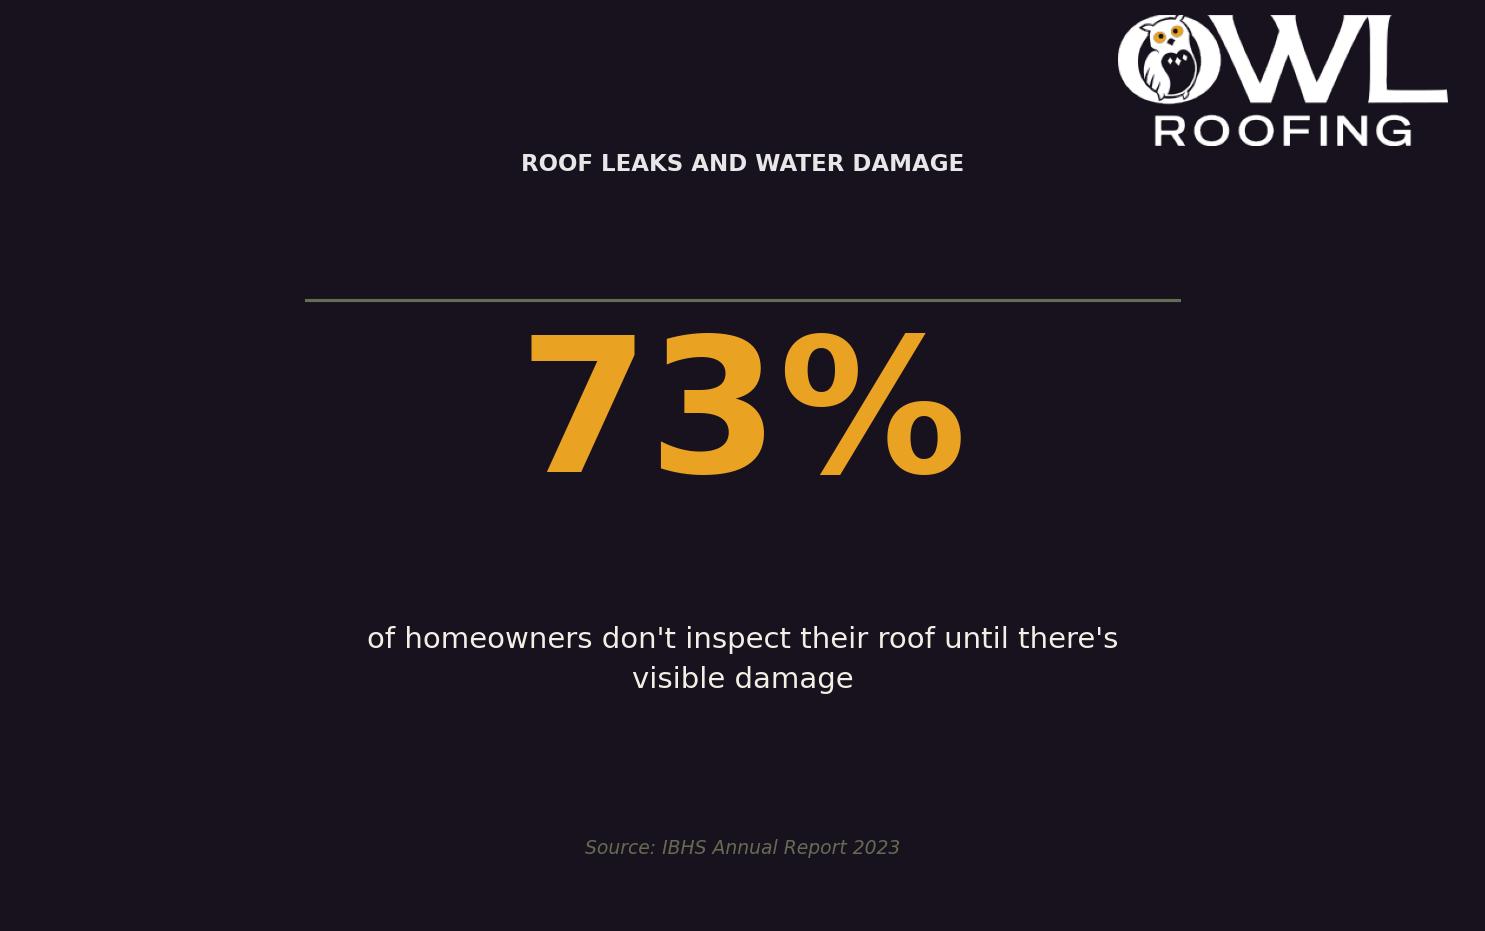
The worst part? Many homeowners don’t realize they have an ice dam problem until the damage is already done. According to the Insurance Institute for Business & Home Safety (IBHS), 73% of homeowners don’t inspect their roof until there’s visible damage. By then, you’re not preventing a problem—you’re cleaning up after one.
Understanding Ice Dams: What’s Actually Happening Up There
The Science Behind Ice Dam Formation
Here’s a quick physics lesson (don’t worry, we’ll keep it painless). Ice dams form because different parts of your roof are at different temperatures. The upper sections of your roof—the parts closest to your warm attic—get heated from below. Snow sitting on those warm sections melts. That water trickles down toward the eaves, which are colder because they extend past your heated living space.
When that melted water hits the cold eaves, it refreezes. A little ice ridge forms. More water flows down. More ice accumulates. Pretty soon, you’ve got a dam—a literal barrier of ice that traps water behind it. That trapped water has nowhere to go but under your shingles and into your home.
According to the IBHS, the primary cause of ice dam formation is inadequate insulation and ventilation in the attic. In other words, it’s not just bad luck or Minnesota’s brutal winters (though those certainly don’t help). It’s usually a fixable problem with your home’s thermal performance.
Think of your roof like a frozen lake. If the temperature stays consistently below freezing, the ice stays solid and stable. But if you’ve got heat escaping from below, you get weak spots, melting, and refreezing in all the wrong places. A “cold roof”—one that stays uniformly cold across its entire surface—won’t melt snow unevenly, which means no water running down to form dams at the edges.
The Culprits: What’s Causing Your Ice Dam Problem
Insulation: The Invisible Problem
If your attic feels toasty in winter, that’s not a good thing. It means heat from your living space is escaping upward through your ceiling, warming your attic, and consequently warming your roof. That warmth is literally melting money off your roof—both in heating costs and potential ice dam damage.
The U.S. Census Bureau reports that homes built before 1980 are more likely to have inadequate insulation. If your home falls into that category, your attic insulation might be compressed, deteriorated, or simply not up to modern standards. Minnesota’s climate calls for insulation with an R-value of R-49 to R-60 in the attic. If you’re sitting at R-19 (common in older homes), you’re essentially heating your roof and inviting ice dams to form.
But even newer homes aren’t immune. Gaps around light fixtures, attic hatches, plumbing stacks, and ductwork can let warm air leak into your attic space. These “thermal bypasses” might seem minor, but they create hot spots on your roof that melt snow in irregular patterns—exactly the conditions ice dams love.
Ventilation: Let Your Attic Breathe
Proper insulation keeps heat from entering your attic. Proper ventilation ensures that any heat that does escape gets flushed out quickly. Your attic needs a continuous flow of cold outside air to keep the roof surface uniformly cold.
Most homes use a combination of soffit vents (along the eaves) and ridge vents (along the peak) to create natural airflow. Cold air enters at the bottom, rises as it warms, and exits at the top. When this system works correctly, your roof stays cold and snow stays frozen until it naturally slides off or sublimates.
Problems arise when insulation blocks soffit vents, when ridge vents are inadequate or absent, or when bathroom fans or dryer vents exhaust directly into the attic space (a surprisingly common issue). All of these reduce airflow and let heat accumulate where it shouldn’t.
Roof Design and Maintenance
Some roofs are more prone to ice dams than others. Low-slope roofs don’t shed snow as effectively as steeper pitches. Complex rooflines with valleys and dormers create areas where snow accumulates and heat concentrates. North-facing roof sections stay colder and may not have ice dam issues, while south-facing sections get sun exposure that accelerates the melt-refreeze cycle.
Then there’s basic maintenance. Clogged gutters and downspouts make everything worse. When gutters are packed with leaves, the water from melting snow has nowhere to drain, so it backs up and freezes right at the roof’s edge. The NRCA recommends annual roof inspections to catch these issues before they become expensive problems.
Why Twin Cities Homeowners Should Pay Extra Attention
Look, every northern state deals with ice dams. But Minnesota? We’ve got a special talent for them. The average winter temperature in the Twin Cities hovers around 15°F, with frequent fluctuations above and below freezing. We don’t just get cold—we get that maddening back-and-forth where it’s 28°F and sunny one day, 5°F the next, then back to 32°F with snow.
These freeze-thaw cycles are the perfect recipe for ice dam formation. Snow melts a little, refreezes, more snow falls on top, the bottom layer melts again. It’s like your roof is running a science experiment in ice dam creation, and your house is the laboratory.
Here in Shoreview and throughout the Twin Cities, we also get serious snowfall. When you’ve got 12 inches of snow sitting on your roof for weeks, even small amounts of heat escape can melt enough snow to create significant ice dams. The more snow, the more insulation it provides (ironically), which can actually make your roof surface warmer beneath the snow pack and accelerate melting.
And let’s talk about our housing stock. The Twin Cities is full of charming older homes—split-levels from the ’60s, Cape Cods from the ’50s, bungalows from even earlier. These houses have character, but they often have attics that were insulated to standards that made sense when heating oil was cheap and climate science was young. If your home is more than 40 years old, there’s a good chance your attic isn’t equipped to handle a Minnesota winter without creating ice dam conditions.
Your Action Plan: How to Prevent Ice Dams
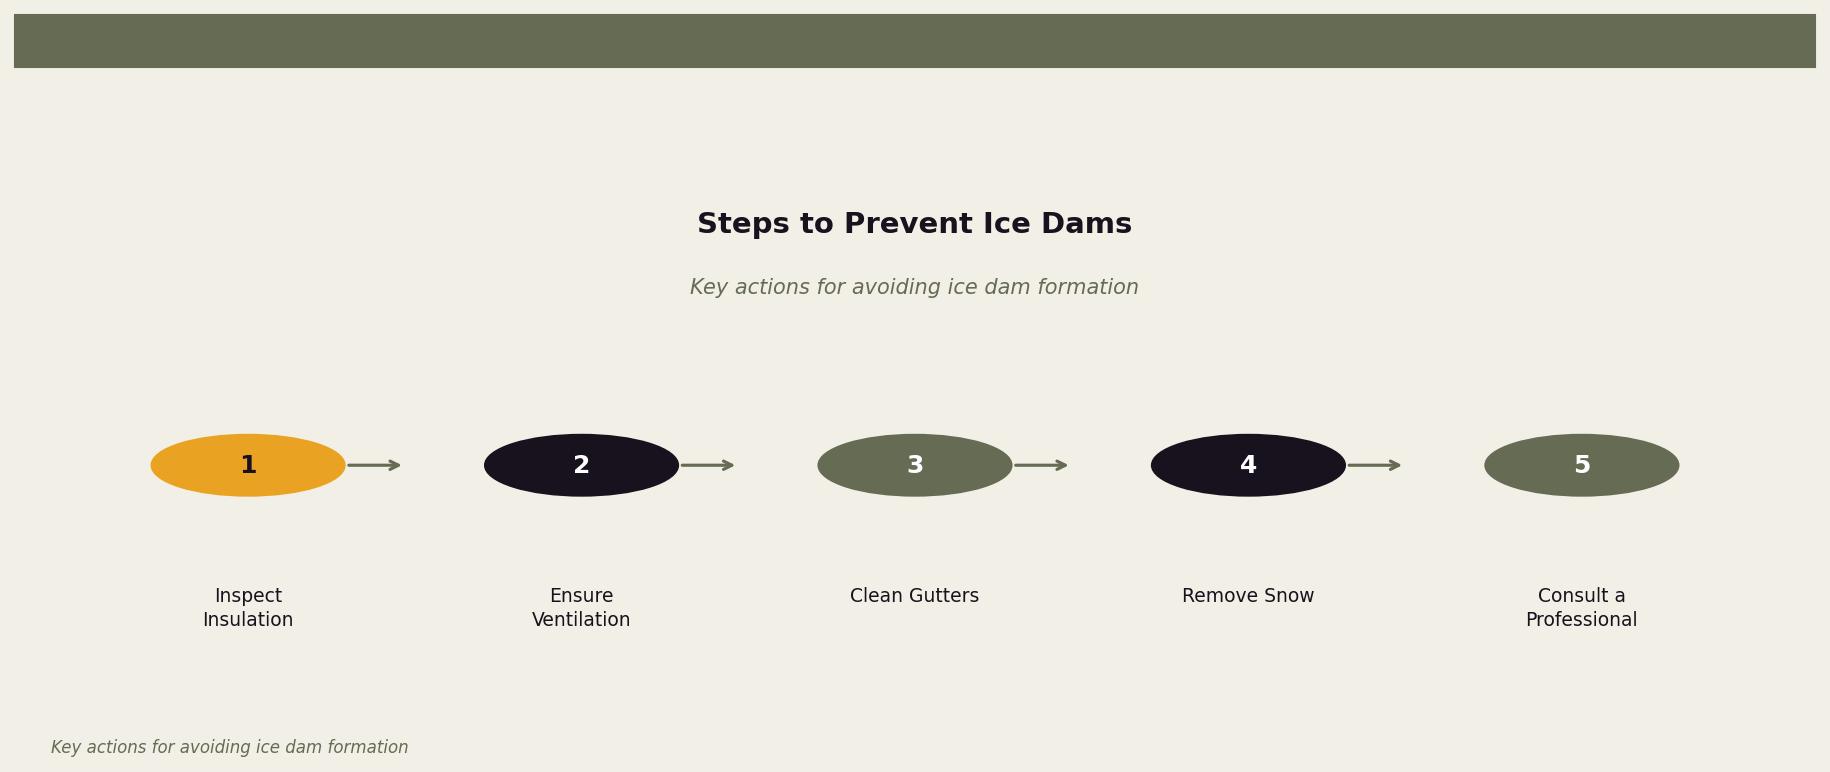
Step 1: Assess Your Attic
Grab a flashlight and climb up into your attic on a cold day. What do you see? If the insulation is thin, uneven, or compressed, that’s a problem. If you can see the tops of ceiling joists poking through, you definitely need more insulation. Look for gaps around any penetrations—pipes, wires, light fixtures, the attic hatch itself. Every gap is a pathway for warm air to escape.
While you’re up there, check your ventilation. Can you see daylight through the soffit vents? Is there a ridge vent or other exhaust ventilation at the top of the attic? Is insulation blocking the airflow path from soffits to ridge? Many homeowners discover that previous insulation jobs accidentally blocked their ventilation—solving one problem while creating another.
Step 2: Upgrade Your Insulation
If your attic insulation is below R-49, consider adding more. This is often a straightforward DIY project if you’re adding loose-fill or batt insulation on top of existing material. For more complex situations—like insulating finished attic spaces or addressing major air leaks—a professional energy audit can pinpoint exactly where your home is losing heat and recommend targeted solutions.
Don’t forget to seal those air leaks before adding insulation. Foam sealant around light fixtures, weatherstripping on the attic hatch, and proper sealing around plumbing and electrical penetrations can make a huge difference in how much heat reaches your roof.
Step 3: Clean Your Gutters (Yes, Really)
This sounds too simple, but clogged gutters are ice dam accelerators. Water that can’t drain properly freezes in place, giving ice dams a head start. Clean your gutters in late fall after the leaves have dropped, and check downspouts to make sure water flows freely away from your foundation.
Step 4: Remove Snow Strategically
After heavy snowfalls, consider using a roof rake to remove snow from the first three to four feet of your roof’s edge. This creates a clear zone where melting water can flow off without encountering a frozen barrier. Roof rakes are inexpensive, available at any hardware store, and much safer than climbing up on a snowy roof with a shovel.
A word of caution: don’t try to chip away at ice dams with a hammer, ice pick, or other tools. You’ll likely damage your shingles and create new paths for water to enter your home. If ice dams have already formed, it’s time to call a professional.
Step 5: Consider Heat Cables (A Temporary Fix)
Heat cables installed along the eaves can prevent ice dams by keeping that critical zone above freezing. However, they’re an energy-intensive Band-Aid, not a cure. If you’re relying on heat cables year after year, you’re treating the symptom instead of the disease. They’re best used as a short-term measure while you address the underlying insulation and ventilation issues.
Step 6: Get a Professional Assessment
If you’ve had ice dam problems in the past, or if your home is older and you suspect insulation issues, a professional roof inspection can identify vulnerabilities you might miss. A roofing expert can evaluate your roof’s design, check for existing damage, assess ventilation, and recommend both immediate and long-term solutions specific to your home.
Don’t Wait Until the Damage Is Done
Here’s the reality: preventing ice dams is almost always cheaper, easier, and less stressful than dealing with the aftermath. That ceiling stain, the ruined insulation, the mold remediation, the insurance claims, the temporary repairs while you wait for permanent fixes—none of that is fun. None of it is cheap. And all of it is avoidable with some proactive attention to your roof, attic, and gutters.
Winter in Minnesota is challenging enough without your house working against you. Understanding what causes ice dams puts you in control. You’re not at the mercy of the weather—you’re equipped to protect your home before the first flake falls.
Need a Second Opinion? We’re Happy to Help
At Owl Roofing, we’ve seen what Minnesota winters do to roofs. Ice dams, wind damage, heavy snow loads—you name it, we’ve helped our neighbors through it. We’re a family-owned company right here in Shoreview, serving homeowners throughout the Twin Cities. No franchise scripts, no storm-chaser pressure tactics. Just honest assessments and quality work from people who live in the same climate you do.
If you’re concerned about ice dams—or you just want someone to take a look before winter hits—give us a call at 651-977-6027 or visit owlroofing.com/. We’ll tell you exactly what we see and what we recommend. No more, no less.
Protect Your Nest.
📍 Owl Roofing Serves the Entire Twin Cities Metro
Andover · Anoka · Apple Valley · Arden Hills · Big Lake · Blaine · Bloomington · Brooklyn Center · Brooklyn Park · Burnsville · Champlin · Chanhassen · Chaska · Columbia Heights · Coon Rapids · Cottage Grove · Crystal · deephaven · Delano · Eagan · East Bethel · Eden Prairie · Excelsior · Farmington · Forest Lake · Fridley · Golden Valley · Ham Lake · Hastings · Hopkins · Hugo · Inver Grove Heights · Lake Elmo · Lakeville · Lino Lakes · Mahtomedi · Maplewood · Mendota Heights · Minneapolis · Minnetrista · Mound · Mounds View · New Brighton · New Hope · North Oaks · North St. Paul · Oak Grove · Oakdale · Plymouth · Prior Lake · Ramsey · Richfield · Robbinsdale · Rosemount · Roseville · Saint Paul · Savage · Shakopee · Shoreview · South St. Paul · St. Louis Park · St. Michael · St. Paul · Stillwater · Vadnais Heights · Victoria · Waconia · wayzata · West St. Paul · White Bear Lake · woodbury
Licensed Minnesota roofing contractor · Free inspections · 10-year workmanship warranty · Get a free estimate →
