


How to Find a Roof Leak Step by Step
 12min Read
 Posted 11.17.2025
How to Find a Roof Leak: Step by Step Guide for Twin Cities Homeowners
That mysterious brown stain on your ceiling? It’s not going away on its own—and by the time you see it, water has probably been pooling in your attic for weeks. Here’s the frustrating truth: roof leaks are sneaky. The spot where water drips onto your living room floor is almost never directly below the actual hole in your roof.
- Lawn swept 3x with magnets
- Storm restoration specialists
- We actually answer: (651) 977-6027
 5.0 · 90+ reviews
 Accredited
Owl is the local family-owned roofer that actually cares.
250+ Twin Cities families have trusted us with their homes. Book a free inspection and see why.
★★★★★“We couldn’t be happier with how everything turned out. From the beginning to the end, the whole experience was great.”
Rob Larson, Local Homeowner + Owl Customer
A real person calls you back, usually within the hour.
But here’s the good news: you don’t need to be a roofing expert to track down a leak. With some patience, a garden hose, and this step-by-step guide, you can find exactly where water is getting in—and stop it before it turns into a major headache. Let’s get into it.
Why Finding a Leak Fast Actually Matters
Look, we get it. A small water stain doesn’t feel like an emergency. You’ve got a hundred other things on your to-do list, and “investigate mysterious ceiling spot” keeps getting bumped. But here’s what happens when you wait:
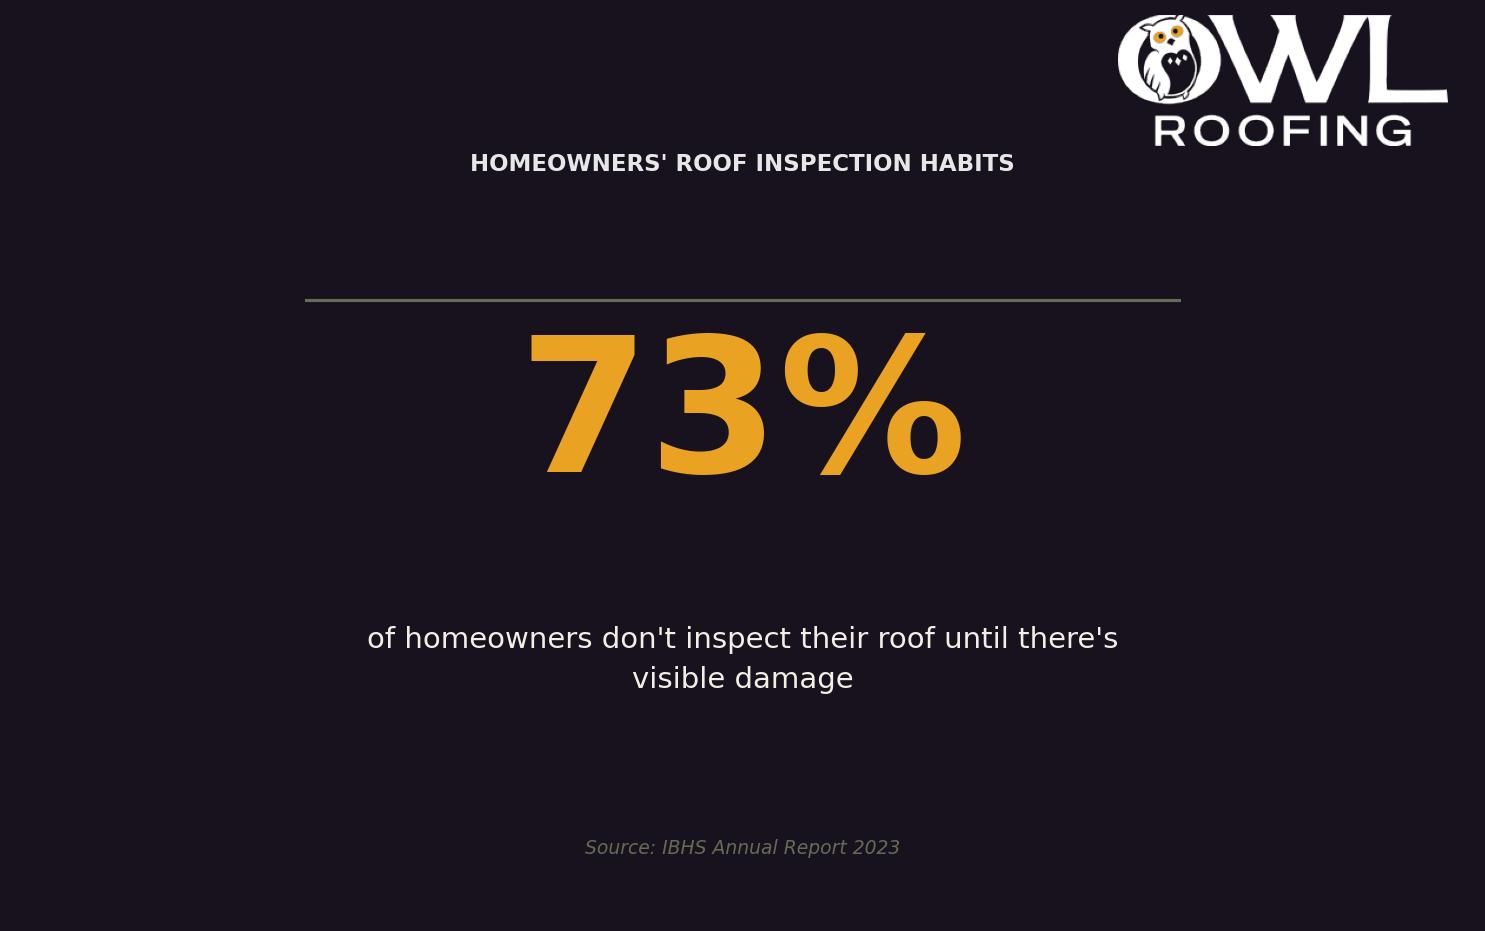
According to the Insurance Institute for Business & Home Safety (IBHS), roof leaks are responsible for 73% of water damage claims in homes. That’s not a typo—nearly three-quarters of all water damage starts at the roof. And we’re not talking about minor inconveniences. We’re talking rotted framing, destroyed insulation, and mold colonies setting up shop in your walls.
In the Twin Cities, the stakes are even higher. Our average annual snowfall tops 50 inches, and the constant freeze-thaw cycle is brutal on roofs. One small gap in your flashing can turn into a major structural problem over a single Minnesota winter. Ice forms, expands, and basically pries your roofing materials apart like a crowbar.
The math is pretty simple: a $200 repair caught early beats a $15,000 renovation any day of the week. So let’s find that leak.
Step One: Spot the Warning Signs Inside Your Home
What to Look For on Ceilings and Walls
Start your detective work inside. Grab a flashlight and walk through every room, looking up. Here’s what should make your ears perk up:
- Water stains: Brown or yellowish rings on ceilings or walls. These might look faded and old, but that doesn’t mean the leak has stopped—it might just be dormant until the next rain.
- Peeling or bubbling paint: When moisture gets trapped behind paint, it loses adhesion. If your ceiling paint looks like it’s trying to escape, water is the likely culprit.
- Mold or mildew spots: That musty smell in your spare bedroom? Check the ceiling corners. Mold loves the damp, dark conditions that leaks create.
- Sagging drywall: This is more serious—it means water has been accumulating for a while. If your ceiling looks droopy or swollen, don’t poke it. Seriously. You might get an unpleasant surprise.
The Attic Investigation
Your attic is where the real clues hide. The National Roofing Contractors Association (NRCA) recommends checking your attic as the first line of defense in roof leak detection. Here’s what to look for:
- Damp or compressed insulation: Wet insulation loses its fluffiness and becomes matted down. Run your hand over it—if sections feel damp or compacted, you’ve found a problem area.
- Water trails: Look for streaks or staining on the rafters and sheathing. Water travels, so trace these marks upward toward the roof deck.
- Daylight peeking through: Turn off your flashlight and let your eyes adjust. Any pinpricks of light coming through the roof boards? That’s where water can get in too.
- Mold or dark spots on wood: Black staining on rafters or roof decking signals prolonged moisture exposure.
Pro tip: Do this inspection on a dry day first. It’s easier to spot old water damage without fresh moisture confusing things. Then check again during or right after a rain to see active leaks.
Step Two: Examine Your Roof’s Exterior
The Ground-Level Survey
Before you grab a ladder, do a walk-around from the ground. Use binoculars if you’ve got them. You’re looking for anything that looks “off”:
- Shingles that are curled, cracked, or completely missing
- Dark patches where granules have worn away
- Flashing that looks bent, rusted, or pulled away from the roof
- Gutters overflowing or sagging (this causes water to back up under shingles)
The Trouble Spots: Where 90% of Leaks Happen
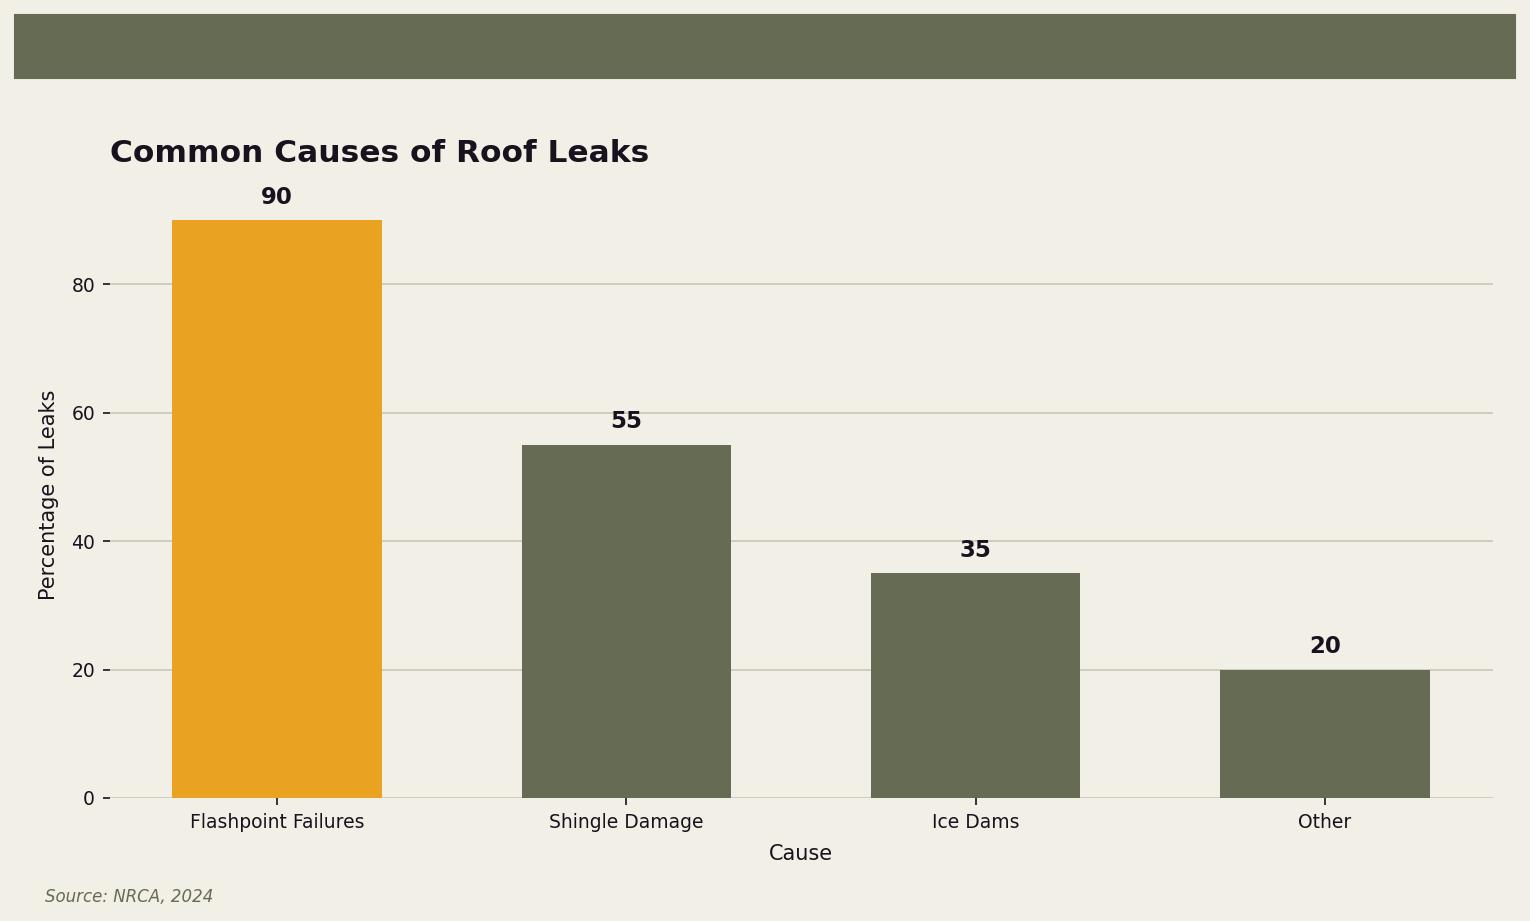
Here’s a stat that should focus your search: the NRCA reports that 90% of roof leaks occur at flashpoints—the places where different materials meet or where your roof is penetrated. In plain English, that means:
- Chimneys: The flashing around your chimney takes a beating. Look for gaps between the metal and the masonry, or caulk that’s cracked and pulling away.
- Skylights: The seals around skylights degrade over time. Check for cracked glazing or damaged weatherstripping.
- Vent pipes: Those pipes poking through your roof for plumbing and exhaust? Each one has a rubber boot that can crack, especially after Minnesota’s temperature swings.
- Valleys: Where two roof slopes meet, water concentrates as it runs off. Debris buildup or damaged shingles here cause problems fast.
- Roof edges and eaves: Ice dams form here in winter, forcing water backward under your shingles.
If you’re comfortable on a ladder and your roof pitch isn’t too steep, a closer look at these areas can reveal obvious damage. But please—safety first. Wet or icy roofs are slip hazards, and a fall isn’t worth any repair savings.
Step Three: Trace the Leak to Its Source

The Garden Hose Test
Found suspicious areas but can’t pinpoint the exact entry point? Time for the garden hose method. This is old-school but effective.
You’ll need two people for this: one on the roof with the hose, one in the attic with a flashlight and a way to communicate (phones work great).
Here’s the process:
- Start at the lowest point of the suspected area and work upward—you want to isolate sections.
- Soak one area at a time for several minutes. Be patient. Water can take a while to travel to where it’s visible.
- The person in the attic watches for dripping or wet spots appearing.
- When water shows up inside, you’ve found your general area. Now narrow it down by moving the hose in smaller increments.
This method takes time—sometimes an hour or more—but it works. The key is moving slowly and systematically instead of spraying water everywhere and hoping for the best.
Going High-Tech: Infrared Detection
Some leaks are stubborn. The water entry point might be feet away from where it’s showing up inside, traveling along rafters or pooling above insulation before finally dripping through. For these tricky cases, technology helps.
Infrared cameras detect temperature differences caused by moisture. Wet areas show up cooler than dry areas, creating a clear visual map of where water is hiding. According to the IBHS, using infrared technology increases leak detection accuracy by up to 30%.
You can rent these cameras at many home improvement stores for $50-100 per day. It’s worth it for leaks that have you stumped—especially if you’ve already tried the hose method without success.
Minnesota-Specific Challenges: Ice Dams and Freeze-Thaw Cycles
If you’ve lived through a Twin Cities winter, you know our climate doesn’t go easy on roofs. Two issues in particular cause more leak problems here than almost anywhere else in the country:
Ice Dams: The Silent Roof Destroyer
Ice dams form when heat escapes through your roof, melting snow at the peak. That water runs down toward the colder eaves, refreezes, and creates a ridge of ice. As more snow melts, water pools behind this dam—and it has nowhere to go but under your shingles and into your home.
Signs you’ve had ice dam damage:
- Icicles hanging from your gutters (they look pretty but signal trouble)
- Water stains appearing on exterior walls
- Leaks that only happen during or after snowmelt, not during rain
The real fix for ice dams isn’t removing ice—it’s preventing heat from escaping your roof in the first place. That means proper attic insulation and ventilation. The U.S. Census Bureau reports that homes with adequate insulation are 25% less likely to experience leak-related damage. It’s an investment that pays off fast in Minnesota.
Freeze-Thaw Damage
Every time temperatures swing from below freezing to above (which happens dozens of times each winter here), moisture in small cracks expands and contracts. This gradually widens gaps in flashing, loosens shingle adhesive, and creates entry points for water.
After winter, do a thorough inspection of all those flashpoints we mentioned earlier. Spring is when freeze-thaw damage becomes visible—and when you can fix it before summer storms make things worse.
Your Action Plan: What to Do Once You Find the Leak
You’ve done the detective work. You know where water is getting in. Now what?
Immediate Damage Control
If water is actively coming in:
- Place buckets or containers to catch drips
- Move furniture and valuables away from the affected area
- If there’s a bulge in your ceiling from pooling water, carefully poke a small hole to drain it into a bucket (this prevents the whole ceiling section from collapsing)
Temporary Repairs
For small, accessible problems, temporary fixes can buy you time:
- Roofing tape or sealant: Good for small cracks in flashing or around vent boots
- Tarps: If shingles are damaged or missing, a weighted tarp over the area keeps water out until permanent repairs happen
- Roofing cement: Useful for resealing lifted shingle edges
These are stopgaps, not solutions. They’ll protect your home through the next storm, but they won’t last through a Minnesota winter.
Professional Assessment and Repair
Unless the leak is truly minor (a single cracked vent boot, for instance), a professional inspection is worth the investment. Roofers can spot damage you might miss and assess whether repairs will hold or if more extensive work is needed.
The NRCA recommends bi-annual roof inspections—spring and fall—to catch potential issues before they become leaks. Think of it like a dental checkup for your house: small problems addressed early stay small and cheap.
Preventing Future Leaks: The Maintenance Checklist
Once you’ve fixed the current leak, keep it from happening again:
- Clean gutters twice yearly: Clogged gutters cause water backup and ice dams
- Trim overhanging branches: They drop debris on your roof and can damage shingles in storms
- Check attic ventilation: Proper airflow prevents heat buildup that causes ice dams
- Inspect after major storms: High winds and hail damage might not be obvious from the ground
- Replace worn weatherstripping: Around skylights, vents, and any roof penetrations
When to Call In the Pros at Owl Roofing
Some leaks you can track down yourself. Others need experienced eyes—especially when water damage has been happening for a while or you can’t pinpoint the source despite your best efforts.
That’s where we come in. At Owl Roofing, we’ve seen every type of roof leak the Twin Cities can throw at a home—ice dam damage, failed flashing, storm destruction, you name it. We’re a family-owned company based right here in Shoreview, not a franchise or a storm-chasing crew that disappears after cashing your check. Tim, Bea, Noah, and Anya live in this community too, and we treat your roof like we’d treat our own.
If you’ve found a leak (or suspect one), give us a call at 651-977-6027 or visit owlroofing.com/. We’ll take a look, tell you exactly what’s going on, and explain your options in plain English—no pressure, no runaround. We serve the entire Twin Cities metro, and we’re always happy to help a neighbor.
Protect Your Nest.
📍 Owl Roofing Serves the Entire Twin Cities Metro
Andover · Anoka · Apple Valley · Arden Hills · Big Lake · Blaine · Bloomington · Brooklyn Center · Brooklyn Park · Burnsville · Champlin · Chanhassen · Chaska · Columbia Heights · Coon Rapids · Cottage Grove · Crystal · deephaven · Delano · Eagan · East Bethel · Eden Prairie · Excelsior · Farmington · Forest Lake · Fridley · Golden Valley · Ham Lake · Hastings · Hopkins · Hugo · Inver Grove Heights · Lake Elmo · Lakeville · Lino Lakes · Mahtomedi · Maplewood · Mendota Heights · Minneapolis · Minnetrista · Mound · Mounds View · New Brighton · New Hope · North Oaks · North St. Paul · Oak Grove · Oakdale · Plymouth · Prior Lake · Ramsey · Richfield · Robbinsdale · Rosemount · Roseville · Saint Paul · Savage · Shakopee · Shoreview · South St. Paul · St. Louis Park · St. Michael · St. Paul · Stillwater · Vadnais Heights · Victoria · Waconia · wayzata · West St. Paul · White Bear Lake · woodbury
Licensed Minnesota roofing contractor · Free inspections · 10-year workmanship warranty · Get a free estimate →
